Difference between revisions of "Superuniques"
(→Special Area SuperUniques) |
(→Special Area SuperUniques) |
||
| Line 599: | Line 599: | ||
Once a character defeats Baal on a given difficulty level, that character may open the red portal to the [[Secret Cow Level]]. There you will find the [[Cow King]], and countless numbers of his (her?) mooing brethren. Hamburger them all. | Once a character defeats Baal on a given difficulty level, that character may open the red portal to the [[Secret Cow Level]]. There you will find the [[Cow King]], and countless numbers of his (her?) mooing brethren. Hamburger them all. | ||
| − | Besides the Cow King, there are two other realm-only quests. The first has no proper name, and is commonly referred to as the Uber Diablo quest. In this quest players selling Stones of Jordan [[Unique Rings]] may trigger Uber Diablo to appear in the place of one of the SuperUniques in a given game. Uber Diablo is the only monster in the game who can drop [[Unique Charms|Annihilus]], the Unique small charm. See the [[Uber Diablo ]]page for more details. | + | {{Uber Monsters}}Besides the Cow King, there are two other realm-only quests. The first has no proper name, and is commonly referred to as the Uber Diablo quest. In this quest players selling Stones of Jordan [[Unique Rings]] may trigger Uber Diablo to appear in the place of one of the SuperUniques in a given game. Uber Diablo is the only monster in the game who can drop [[Unique Charms|Annihilus]], the Unique small charm. See the [[Uber Diablo ]]page for more details. |
| − | + | The other special quest was added in v1.11 and it is the biggie. It consists of four special areas in which players encounter the six SuperUniques (not including Uber Diablo) listed in the table to the right. Read about them individually, or see the [[Pandemonium Event]] page for full details about all of them and the quests they are a part of. | |
[[category:monsters]] | [[category:monsters]] | ||
[[category:superuniques]] | [[category:superuniques]] | ||
Revision as of 14:25, 12 March 2008
SuperUniques are specially-named boss monsters that are always found in the same locations, and have partially or completely pre-set modifiers. SuperUniques are more powerful than regular boss monsters and usually drop more items of a higher quality. SuperUniques include the biggest monsters, such as Act Bosses, and can have unique graphics, or may just be specially named representatives of a regular monster type.
This page lists all the SuperUniques in the game. Many of them have a wiki page listing their full stats and skills, along with tips, trivia, and other information. (And you're free to create pages for those that do not.)
Contents
- 1 Act One SuperUniques
- 2 Act Two SuperUniques
- 3 Act Three SuperUniques
- 4 Act Four SuperUniques
- 5 Act Five SuperUniques
- 5.1 Dac Farren
- 5.2 Shenk the Overseer
- 5.3 Eldritch the Rectifier
- 5.4 Sharptooth Slayer
- 5.5 Eyeback the Unleashed
- 5.6 Thresh Socket
- 5.7 Frozenstein
- 5.8 Bonesaw Breaker
- 5.9 Snapchip Shatter
- 5.10 Pindleskin
- 5.11 Nihlathak
- 5.12 Talic
- 5.13 Madawc
- 5.14 Korlic
- 5.15 Colenzo the Annihilator
- 5.16 Achmel the Cursed
- 5.17 Bartuc the Bloody
- 5.18 Ventar the Unholy
- 5.19 Lister the Tormentor
- 5.20 Baal
- 6 Special Area SuperUniques
Act One SuperUniques
Corpsefire
Type: Zombie
Special Attributes: Spectral Hit
Found in: The Den of Evil
Quest: Corpsefire and all the other monsters in the Den of Evil must be killed to finish the quest.
Comments: Corpsefire has high physical resistance, and is often physical immune on Hell. This made him a special challenge in earlier versions of the game, since he had to be killed to finish this quest, and since so few monsters were PI in those days.
Bishibosh
Type: Fallen Shaman
Special Attributes: Magic Resistance, Fire Enchanted
Found in: The Cold Plains. Always in one of the fallen camps.
Quest: Not part of any quest.
Comments: Like other shaman SuperUniques, Bishibosh is able to resurrect other Shamans, as well as the common fallen Fallen. In earlier versions of the game, when shaman bosses spawned with a pack of shaman and regular fallen, Bishibosh could be quite difficult as he and his minions resurrected dead Fallen almost as quickly as players could kill them. This challenge was removed in v1.09, when boss shamans were nerfed to only spawn with regular Fallen, rather than Fallen Shaman. Bishibosh can still resurrect shamans, but he does not spawn with a pack of them, so you'll only see this trick occasionally.
Bishibosh, along with Rakakishu, is a sort of demi-god to the other Fallen, who often chant and mutter his name as they fight.
Bonebreaker
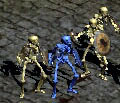
Type: Skeleton
Special Attributes: Extra Strong, Magic Resistant
Found in: The Crypt. (Dungeon below the Burial Grounds.)
Quest: Not part of any quest.
Blood Raven
Type: Corrupt Rogue Archer
Special Attributes: Fire Arrow
Found in: The Burial Grounds
Quest: Blood Raven must be killed to complete the Sisters to the Slaughter quest.
Comments: Blood Raven has the Necromantic ability to summon up new zombies from the Burial Grounds, and can be quite difficult for brand new characters. She is quick and hard to kill, takes a lot of damage, and her fire arrows are highly accurate and rather painful. She will sometimes run outside the graveyard if pursued, but will not move far from the fence. She's the hardest and most dangerous monster to kill in the first few areas of the game, for most new characters.
Coldcrow
Type: Dark Ranger
Special Attributes: Cold Enchanted
Found in: Act I, The Cave
Quest: Not part of any quest.
Rakanishu
Type: Carver
Special Attributes: Lightning Enchanted, Extra Fast
Found in: Act I, The Stony Field
Quest: Rakanishu is not a required kill, but he is always found within the Field of Stones, where players must venture on the Rescue Cain quest.
Comments: Rakanishu and his pack of minions are usually the fastest monsters a new character has seen in the game up to that point, and killing all of them, with the Fallen AI making them scatter in every direction each time one falls, can be amusingly frustrating. Also, Rakanishu is often the first lightning enchanted monster a character encounters, which makes him memorable. He, along with Bishibosh, seems to be a demi-god of sorts to the other Fallen; they constantly grumble and mutter his name as they fight and die.
Treehead Woodfist
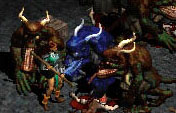
Type: Brute
Special Attributes: Extra Strong, Extra Fast
Found in: Dark Wood
Quest: Not a required kill, but he always spawns right beside the Tree of Innifus, which must be clicked to obtain the Scroll of Inifuss, which is required as part of the Rescue Cain quest.
Comments: Treehead and his brute squad are quite a challenge to new characters, especially ranged attackers, who may end up running quite a distance while firing desperately over their shoulder at the relentless creatures.
Griswold
Type: Special
Special Attributes: Cursed
Found in: Tristram
Quest: Griswold is found in Tristram, where the player must venture to Rescue Cain, but killing him is not required to complete the quest.
Comments: Griswold is a slow but powerful melee attacking human. He can be slow to die, and his high damage and Cursed property makes him dangerous to melee fighters. Griswold was the NPC blacksmith in Diablo I, and his appearance as a monster in Diablo II is a nice continuation of the plot from the first title.
See his stats and more information here.
The Countess
Type: Dark Stalker
Special Attributes: Fire Enchanted
Found in: Forgotten Tower
Quest: The Countess must be killed to complete the Forgotten Tower quest. She's also an integral part of the special Pandemonium Event, since she drops the Key of Terror.
Comments: The Countess was largely ignored until v1.09, when she was given a high possibility to drop a rune when killed. The odds of her rune drops increased in v1.10, and as of v1.11 she is a popular monster to "run" for the potential high level runes she drops:
- Normal: El (r01) - Ral (r08).
- Nightmare: El (r01) - Io/Ko (r18); above Io (r16) is much rarer.
- Hell: El (r01) - Ist/Lo (r28); above Ist (r26) is much rarer.
Pitspawn Fouldog
Type: Tainted
Special Attributes: Cursed, Cold Enchanted
Found in: Jail Level 2
Quest: Not part of any quest.
Bone Ash
Type: Burning Dead Mage
Special Attributes: Extra Strong, Cold Enchanted, Magic Resistant.
Found in: The Cathedral
Quest: Not part of any quest.
Comments: Bone Ash is a popular superunique to kill, since he is so quickly and easily found, in the middle of the Cathedral near the Inner Cloister waypoint.
The Smith
Type: Special
Special Attributes: Extra Strong
Found in: Barracks
Quest: The Smith is found near the weapon stand that holds Chari's smithing hammer. You must return the hammer to Charsi to complete the Tools of the Trade quest. It is not necessary to kill The Smith to complete the quest.
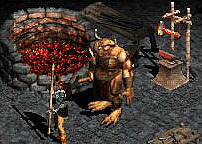
Comments: The Smith is reminiscent of the very scary Butcher, from Diablo I. He's not as fierce or bloody, but he looks similar and moves quickly to initiate a pounding melee attack. He uses the same graphics as Hephasto, found in Act Four. See full stats and more information about The Smith.
Andariel
Type: Act Boss
Special Attributes: Poison Strike, Poison Cloud
Found in: Catacombs Level 4
Quest: Andariel must be killed to complete the Sisters to the Slaughter quest and advance to Act Two.
Comments: Andariel has a special poison projectile attack and poison stinging claws, and should be treated with caution. See her page for full stats and information.
Act Two SuperUniques
Radament
Type: Greater Mummy
Special Attributes: Extra Fast, Resist Cold/Poison
Found in: Sewers Level 3
Quest: Radament must be killed to complete the first quest in Act Two. He drops a scroll worth one skill point, so this is a quest every character wants to complete.
Comments: Radament spawns with a huge pack of various types of skeletons, and he is quick to resurrect them when they are destroyed. Luring the melee skeletons a few screens away helps a lot, as does killing them with cold to shatter their bones, or using them up with corpse skills. The glowing chest near Radament contains gold and a Horadric Scroll, which gives a clue to where one might obtain the Horadric Cube.
Creeping Feature
Type: Decayed
Special Attributes: Extra Strong, Cold Enchanted
Found in: Stony Tomb Level 2
Quest: No quests are associated with this monster.
Comments: The name is a joke based on "feature creep" the gaming industry term for additional features that keep creeping into a game and delaying its completion. Diablo II was released over a year late, and one assumes this monster was named during the endless crunch time.
Blood Witch the Wild
Type: Huntress
Special Attributes: Extra Strong, Cursed
Found in: Halls of the Dead Level 3
Quest: No quest is associated with this boss.
Comments: Blood Witch is always found in a room with the glowing chest that holds the Horadric Cube. It's not necessary to kill Blood Witch to obtain the cube, but it's hard to avoid as quickly as she had her fellow kitties swarm any intruding characters.
Beetleburst
Type: Death Beetle
Special Attributes: Magic Resistant
Found in: Far Oasis
Quest: No quests are associated with Beetleburst.
Comments: Beetleburst is not necessarily Lightning Enchanted, though like all types of dung beetles, he emits sparks when struck.
Coldworm the Burrower
Type: Sand Maggot Queen
Special Attributes: Cold Enchanted, Magic Resistant
Found in: Maggot's Lair Level 3
Quest: Killing Coldworm is not necessary to complete the Horadric Staff quest, but she's found right in the room with the glowing chest, so it's hard to pass her by.
Comments: Coldworm is a giant, swollen maggot with a lovely, screeching, poison-spewing death animation. She spawns new full size maggots once characters approach close enough to activate her, and during long battles her reproductive prowess can grow quite wearisome. She is motionless and has no attacks of any kind, other than the cold and poison she spews upon death. It can be amusing to see her with random modifiers like Extra Fast and Extra Strong when she neither moves nor attacks, but her modifiers are shared with her minions, and that can make a difference in the battle.
Dark Elder
Type: Plague Bearer
Special Attributes: Extra Fast, Magic Resistant
Found in: Lost City
Quest: No associated quests.
Comments: Dark Elder is fast... for a zombie. He's also very often physical immune on hell, and can be quite difficult to kill if he spawns with Stone Skin and some other elemental enchantments, giving him multiple immunities.
Fangskin
Type: Salamander
Special Attributes: Lightning Enchanted, Extra Fast
Found in: Claw Viper Temple Level 2
Quest: Fangskin is not necessary to kill to complete the Tainted Sun quest, but he's found in the room with the golden chest from which you must recover the Viper Amulet, so killing him while you're there is never a bad idea.
Comments: Fangskin is another monster who was made much easier in v1.09. Prior to that patch he and his minions were very dangerous in the confined area, thanks to their solid damage and swarming, stun-locking, speedy attacks. Their damage and ability to stun lock were turned well down in v1.09 though, greatly reducing the danger.
Fire Eye
Type: Invader
Special Attributes: Fire Enchanted, Extra Fast
Found in: Palace Cellar Level 3
Quest: No quests associated with this monster.
Comments: Fire Eye and his minions can be dangerous with their fast speed and rapid attack, so do not let them swarm your character. He usually spawns near the portal to the Arcane Sanctuary, often right in the room with it, but not always.
Summoner
Type: Special
Special Attributes: Extra Strong, Extra Fast, Resist Fire/Cold/Lightning
Found in: Arcane Sanctuary
Quest: The Summoner must be killed to complete his eponymous quest, and to advance to the Canyon of the Magi, the last waypoint in Act Two.
Comments: The Summoner packs a number of dangerous spells, especially his Firewall, which he can cast from well off the visible screen. The flames will absolutely cook new characters who are stuck fighting monsters on the narrow walkways of the Arcane Sanctuary. The Summoner is a true mage, deadly from a distance, but cursed with very low has low hit points, resistances, and defense, which makes him an easy kill, once the distance is closed.
On Hell difficulty, the Summoner will sometimes drop the Key of Hate, an artifact required for the Pandemonium Event. The key has no other purpose, and can not be used by single player characters.
See his full stats and additional information here.
Ancient Kaa the Soulless
Type: Unraveler
Special Attributes: Magic Resistant, Extra Strong, Lightning Enchanted
Found in: Tal Rasha's Tomb (or one of the False Tombs)
Quest: No quests are associated with this monster.
Comments: Ancient Kaa is one of the very few monsters in the game with 3 pre-set modifiers, which makes him one of the very few capable of having five random modifiers in Hell difficulty. This makes for an interesting name hover, but isn't necessarily all that deadly, especially after v1.10 made MSLE bosses so much less dangerous. Dealing with Kaa and his pack in a dungeon crowded with skeletons, zombies, or specters can be a challenge, as quickly and frequently as they can resurrect their fallen undead servants.
Duriel
Type: Act Boss
Special Attributes: Resistant to Cold/Fire/Lightning/Poison
Found in: Duriel's Lair
Quest: Duriel must be killed to complete the Seven Tombs quest, and to move on to Act Three.
Comments: Duriel is the act boss of act two, and is a formidable, tank-like foe. He boasts a fast, painful charging attack, a rapid-strike jab, and a stunning Smite. He was terrifying prior to v1.09, but in that patch his damage was lowered considerably, and he lost his "kill you before the level finishes loading" ability.
See the Duriel page for more information about this boss, including his full stats.
Act Three SuperUniques
Sszark the Burning
Type: Flame Spider
Special Attributes: Extra Strong, Cursed
Found in: Spider Cavern, dungeon below the Spider Forest
Quests: Killing Sszark is not required to retrieve Khalim's Eye from the golden chest, but while you're there, you might as well...
Comments: Sszark is a deceptively dangerous monster. The giant spiders aren't generally that difficult, but they do considerable damage, and when you multiply that by Sszark's Extra Strong minion pack, and Cursed, and the draining poison damage from spider bites, in a small area without much room to retreat, this pack can be challenging.
Witch Doctor Endugu
Type:Soul Killer Shaman
Special Attributes: Magic Resistant, Fire Enchanted
Found in: Flayer Dungeon Level 3
Quests: Killing Endugu is not required, but he's valuable, and always found near the golden chest containing Khalim's Heart.
Comments: Like the few other SuperUnique shamans, Endugu was quite a bit fiercer in earlier versions of the game, when he spawned with a mob of Shaman minions, and foot soldiers, as seen in this old screenshot. Endugu could resurrect his fallen Shaman minons, and all the Shamans could resurrect foot soldiers and blow pipe Flayers, and a battle against him turned into quite the mess. Since v1.09 though, shamans spawn with just foot solider minions, rather than other Shamans, and aren't very hard to kill.
Like all Fetish Shaman bosses, Endugu drops double, when you kill the piggyback shaman, and again when you kill the Flayer that was carrying him. Barbarians can get a triple drop by Horking (using Find Item) the corpse. (Only the Flayer on the bottom can be horked; not the piggybacking shaman too.)
Stormtree
Type: Thrasher
Special Attributes: Extra Fast, Lightning Enchanted
Found in: Exiting Flayer Jungle --> Entering Lower Kurast
Quests: Not attached to any quest.
Comments: Stormtree and his minions spawn in a narrow stretch of jungle between the Flayer Jungle and Lower Kurast. They're best killed by luring them back into the Flayer Jungle, then taking them on over a narrow bridge, where only one or two of the large Thrashers can fight at once.
Battlemaid Sarina
Type: Flesh Hunter
Special Attributes: Extra Fast, Spectral Hit
Found in: The Ruined Temple.
Quests: Killing Sarina is not required to retrieve Lam Esen's Tome, but she will always run up to block your path to the bookstand, so it's often hard to avoid killing her while you're there.
Comments: Sarina spawns in a very large pack of extra fast Flesh Hunters, and while they're just glorified Corrupted Rogues, a dozen of them swarming you at once can be dangerous for any character. It's best to clear out the two narrow wings first, before advancing into the center of the Ruined Temple. You can then retreat to one of the narrow doorways and take on Sarina and her minions one or two at a time.
Icehawk Riftwing
Type: Gloombat
Special Attributes: Cold Enchanted, Teleportation
Found in: Sewers Level 1
Quests: Not attached to any quest.
Comments: Icehawk and his minions are always found near the entrance to Sewers Level 2, where you must proceed to retrieve Khalim's Brain.
Ismail Vilehand
Type: Council Member
Special Attributes: Extra Fast, Cursed
Found in: Travincal
Quests: Ismail and the rest of the Travincal high council must be killed to complete Khalim's Flail.
Comments: Ismail, Geleb, Toorc, and their identical minions are hard to tell apart when they come swarming out of the temple in Tristram. They must all die, and the only one that really matters is Geleb, for his potentially-deadly Fire Enchanted death, so Ismail is dangerous for his Cursed nature, but unavoidable in the mass of his fellows.
Geleb Flamefinger
Type: Council Member
Special Attributes: Extra Strong, Fire Enchanted
Found in: Travincal
Quests: Geleb and the rest of the Travincal high council must be killed to complete Khalim's Flail.
Comments: Geleb was one of the deadliest monsters in the entire game prior to v1.09, not in life, but in death, since his Fire Enchanted death explosion dealt horrendous damage. Many, many hardcore characters met their end to that splat, until v1.09 fixed a bug and toned down the damage considerably.
Toorc Icefist
Type: Council Member
Special Attributes: Cold Enchanted, Stone Skin
Found in: Travincal
Quests: Toorc and the rest of the Travincal high council must be killed to complete Khalim's Flail.
Comments: Toorc is the least dangerous of the high council in Travincal, but often the hardest to kill on Hell, since he frequently spawns with Stone Skin and becomes physical immune. Bring elemental damage or an Amplify Damage object, or a melee character is in for a very long fight.
Bremm Sparkfist
Type: Council Member
Special Attributes: Aura Enchanted and Fire Enchanted (Lightning Enchanted prior to v1.08.)
Found in: Durance of Hate Level 3
Quests: Not required for any quest.
Comments: Bremm is a nasty enemy, but he's not especially difficult to avoid if the goal is simply to get to Mephisto as quickly as possible. Fighting him can be risky, depending on his modifiers. Prior to v1.08 he was terrifying; always Lightning Enchanted and with the potential to spawn Multi-shot and/or Conviction for his aura. Pre v1.09, one hit of an MSLE with Conviction was almost certainly instant death for any melee character in the game, no matter your resistances or damage. Bremm's LE became FE in v1.08, and then in v1.09 the MSLE stacking bug was fixed, removing the instant death danger from monsters with that combination of mods.
Bremm is the only member of the high council to spawn with minions on level 3 of the Durance of Hate.
Wyand Voidbringer
Type: Council Member
Special Attributes: Mana Burn, Teleportation
Found in: Durance of Hate Level 3
Quests: Not required for any quest.
Comments: Wyand was quite annoying in earlier versions of the game, when the High Council were able to fully heal themselves, and teleporting bosses insta-healed every time they teleported. Since those features were modified, Wyand has become largely irrelevant. He does not spawn with any minions.
Maffer Dragonhand
Type: Council Member
Special Attributes: Extra Fast, Extra Strong
Found in: Durance of Hate Level 3
Quests: Not required for any quest.
Comments: Maffer can do substantial damage with his enhanced speed and power, but like the other High Council, he tends to scurry around and pose more than fight, so he's not too dangerous.
Mephisto
Type: Act Boss
Found in: Durance of Hate Level 3
Quests: Mephisto is the Act Boss of Act Three, and must be killed to advance to Act Four.
Comments: Mephisto is the first of the Prime Evils a character faces in Diablo II. He is most dangerous from a distance, where his magical spells can deal heavy damage. Characters are advised to close to melee range, or else lead him to the edge of the blood moat and use spells or fire projectiles from a safe distance.
Mephisto was the first hugely popular "item run" monster, since he drops very nice, high quality items, and can be reached fairly quickly from the Durance Two waypoint. v1.10 made him somewhat more difficult to find by increasing the size of Durance Two, and he can no longer be leached for life or mana on Nightmare or Hell difficulty, but he's still quite a popular item finding destination.
See Mephisto's page for more infomation and a full listing of his stats.
Act Four SuperUniques
Izual
Type: Special
Found in: Plains of Despair
Quests: Izual must be killed to complete the Fallen Angel quest.
Comments: Izual is the original tank. Not very fast or damaging, but possessed of high defense and quite a few hit points. Prior to v1.08, he was basically a one-monster "repairs needed" device, sure to send players off to town for repairs or arrow/bolt refills mid-battle. He's less durable in v1.11, but can still take new characters quite a while to grind down to nothing. For all his toughness, his damage isn't very high, and the combined effect of his chilling hits, Frost Novas, and hit points make him more time-consuming nuisance than serious threat to survival.
See Izual's stats and more information about the demon.
Hephasto the Armorer
Type: Special
Special Attributes: Aura Enchanted (Conviction), Spectral Hit, Magic Resistant
Found in: The River of Flame
Additional Information Click here for more information on Hephasto.
Quests: Hephasto must be killed to acquire the Hellforge Hammer, which you must equip and use to smash Mephisto's soulstone on the Hellforge to finish that quest.
Comments: Hephasto isn't too fierce in D2X, but early in D2C, prior to v1.07, he was terrifying thanks to big damage and his Cursed and Extra Strong properties. In v1.07 he lost some of his damage and both of his nasty modifiers, making him far less dangerous. He shares graphics with The Smith from Act One, and was clearly modeled in an homage to The Butcher, a famous monster from Diablo I.
Grand Vizier of Chaos
Type: Storm Caster
Special Attributes: Extra Strong, Fire Enchanted
Found in: The Chaos Sanctuary
Quests: The Vizier must be killed, along with the other two "Seal Bosses," Lord de Seis and the Infector of Souls, to summon Diablo.
Comments: The Vizier is found in the northern (or left, depending on how you look at it) wing of the Chaos Sanctuary. Since MSLE was fixed/nerfed in v1.10, this Finger Mage boss and his pack are no longer very dangerous, though they can be annoying for some characters thanks to their mana-draining projectiles.
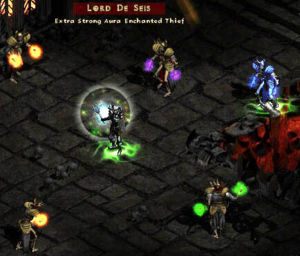
Lord De Seis
Type: Oblivion Knight
Special Attributes: Extra Strong, Aura Enchanted (Fanaticism)
Found in: The Chaos Sanctuary
Quests: Lord de Seis must be killed, along with the other two "Seal Bosses," The Grand Vizier of Chaos and the Infector of Souls, to summon Diablo.
Comments: De Seis originally gifted with the Thief monster modifier, a rare property that enabled him to snatch potions out of a character's belt during the battle. Thief was buggy, and was removed in an early patch. De Seis also lost his knack of spawning with a whole minion pack of other Oblivion Knights in v1.07, when boss shamans were changed to spawn with foot soldiers if their type, rather than other shamans.
Thanks to these changes, De Seis is now simply another Oblivion Knight, and can be dangerous if he spawns with a nasty aura (such as Might to strengthen his minions), but he's nothing special anymore.
Infector of Souls
Type: Venom Lord
Special Attributes: Extra Fast, Spectral Hit
Found in: The Chaos Sanctuary
Quests: The Infector of Souls must be killed, along with the other two "Seal Bosses," The Grand Vizier of Chaos and the Lord de Seis, to summon Diablo.
Comments: The Infector will spawn with Physical Immunity on Hell difficulty if he gets Stone Skin as a random mod. For this reason players who have trouble killing PI bosses sometimes hit his seal (to the south) first, so they'll know if they must abort the Diablo run before spending time to clear out the rest of the Chaos Sanctuary.
Diablo
Type: Act Boss
Found in: The Chaos Sanctuary
Quests: Diablo is the final boss of Act Four, and must be killed to finish the game in D2C, or to advance to Act Five in D2X.
Comments: Diablo has a variety of spells and, like many monsters in the game, was much more dangerous in early versions, when his Firestorm and Pink Lightning Hose could insta-kill characters under the right circumstances. He's been nerfed in various patches, and is no longer quite the terror he once was. Especially not when compared to Uber Diablo or Pandemonium Diablo, much fiercer versions of himself added in special realm-only quests in v1.10 and v1.11.
See Diablo's page for more details about his attacks, and full stats.
Act Five SuperUniques
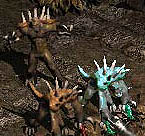
Dac Farren
Type: Demon Gremlin
Special Attributes: Cold Enchanted
Found in: The Bloody Foothills
Quests: Not associated with any quest.
Comments: Doc Farren and his Imp pack are found in a narrow stretch midway through the Bloody Foothills. Prior to v1.10 and the reorganization of the static monster layout of Act Five, Dac's was the only boss pack in the entire level, not including Shenk's minion mob.
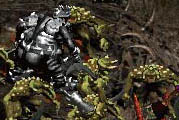
Shenk the Overseer
Type: Overseer
Special Attributes: Extra Strong
Found in: The Bloody Foothills
Quests: Kill Shenk to complete the Stop the Siege quest.
Comments: Shenk spawns amidst a huge mob of minions, and is a tempting item run and experience target, sitting as near as he does to the Frigid Highlands waypoint. Since MSLE was nerfed in v1.10, he is not a threat to any but the most underpowered characters. Shenk's corpse can not be touched by any corpse skill, including Find Item. Shenk gets his name from Phil Shenk, one of the lead artists on Diablo II.
Eldritch the Rectifier
Type: Enslaved
Special Attributes: Extra Fast
Found in: Frigid Highlands
Quests: Not part of any quest.
Comments: Eldritch is an easy and quick kill, and is popular with item running characters.
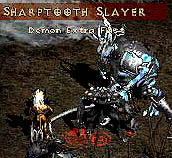
Sharptooth Slayer
Type: Overlord
Special Attributes: Extra Fast
Found in: Frigid Highlands
Quests: Not part of any quest.
Comments: Sharptooth Slayer is a lasher boss found in the first fortified walls area of the Frigid Highlands, often quite near the first pen of captured Barbarians. He spawns with several minions, who are quite noticeable for their Extra Fast footspeed.
Eyeback the Unleashed
Type: Death Mauler
Special Attributes: Extra Fast, Extra Strong
Found in: Frigid Highlands
Quests: Not part of any quest.
Comments: Eyeback is found at the very end of Frigid Highlands, where the pathway narrows to enter the Arreat Plateau.
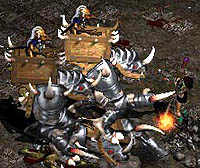
Thresh Socket
Type: Blood Bringer
Special Attributes: Cursed
Found in: Arreat Plateau
Quests: Not part of any quest.
Comments: Prior to v1.10, Thresh was found randomly located in the Frigid Highlands. After v1.10, he is found guarding the tunnel from the Arreat Plateau into the Crystalline Passage. Imps will sometimes mount up on Thresh and add their Inferno attack to the adventure.
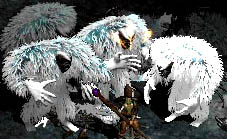
Frozenstein
Type: Frozen Abyss
Special Attributes: Cold Enchanted, Mana Burn
Found in: Frozen River
Quests: Frozenstein is not part of any quest, but he is found very near the frozen Anya, and it's hard not to kill him while completing the Prison of Ice quest.
Comments: Frozenstein and his minions usually block the narrow bridge over the the island upon which Anya is imprisoned. The mob of Yeti can be difficult to deal with if they spawn with Extra Fast, to add to the inherent quick attack rate. It's best to use the various bridges in the area to force the pack to come at you one or two at a time.
Bonesaw Breaker
Type: Reanimated Horde
Special Attributes: Extra Strong, Magic Resistant
Found in: Glacial Trail
Quests: Not part of any quest.
Comments: Bonesaw spawns in a special, stage-like area in the Glacial Trail, right beside a golden chest. It's worth the detour to kill this SuperUnique and open the super chest, if you are exploring the level.
Snapchip Shatter
Type: Frozen Creeper
Special Attributes: Cursed, Cold Enchanted
Found in: Icy Cellar
Quests: Not part of any quest.
Comments: Snapchip always spawns near the golden chest in the Icy Cellar dungeon level, below the Glacial Trail. Like all Frozen Creepers, he shatters upon death, so Find Item can not be used on him.
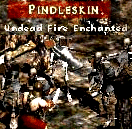
Pindleskin
Type: Defiled Warrior
Special Attributes: Fire Enchanted
Found in: Nihlathak's Temple
Quests: Not part of any quest.
Comments: Pindleskin and his minions always appear in the narrow temple leading to the entrance to the Halls of Anguish. Pindleskin is one of the most popular "item run" monsters in the game, for his easy access and the fact that he can drop from the highest treasure class in the game. Pindleskin, along with all Defiled Warriors, got a substantially boost to the accuracy and damage of their charge attack in v1.10, this made him potentially dangerous for characters with under 1000 hit points, especially when cursed.
Nihlathak
Type: Special
Special Attributes: Corpse Explosion, Summon Baal's Minions, Arctic Blast
Found in: Halls of Vaught
Quests: Nihlathak must be slain to complete the Betrayal of Harrogath quest.
Comments: Nihlathak is one of the more dangerous SuperUniques in the game, thanks to his ability to cast the Necromancer skill, Corpse Explosion. See Nihlathak's page for full details and stats.
Talic
Type: Special Barbarian
Special Attributes: Whirlwind
Found in: The Arreat Summit
Quests: Talic, Madawc, and Korlic must be killed to complete the Rite of Passage quest.
Comments: Read about Talic and see his full stats and lore on his page.
Madawc
Type: Special Barbarian
Special Attributes: Shout, Double Throw
Found in: The Arreat Summit
Quests: Talic, Madawc, and Korlic must be killed to complete the Rite of Passage quest.
Comments: Read about Madawc and see his full stats and lore on his page.
Korlic
Type: Special Barbarian
Special Attributes: Leap Attack
Found in: The Arreat Summit
Quests: Talic, Madawc, and Korlic must be killed to complete the Rite of Passage quest.
Comments: Read about Korlic and see his full stats and lore on his page.
Colenzo the Annihilator
Type: Warped Shaman
Special Attributes: Fire Enchanted
Found in: Throne of Destruction
Quests: Colenzo and his entire pack must be killed before Baal will summon up the next bunch of monsters. All the packs must be destroyed to continue on your way to completing the Eve of Destruction quest.
Comments: Prior to v1.10, Colenzo spawned with a mob of shamans. In v1.10 and later he spawns with regular foot soldier Fallen, who are quickly dispatched with. Colenzo can spawn with MSLE on Hell, but after v1.10 that combination of modifiers is no longer dangerous enough to take precautions to avoid. Colenzo represents Act One, in Baal's sequential run of Act-themed monster packs.
Achmel the Cursed
Type: Greater Mummy
Special Attributes: Immune to Poison
Found in: Throne of Destruction
Quests: Achmel and his entire pack must be killed before Baal will summon up the next bunch of monsters. All the packs must be destroyed to continue on your way to completing the Eve of Destruction quest.
Comments: Achmel is one of the few shaman bosses who still spawns with a pack of Shamans, rather than just foot soldiers. Achmel can spawn with MSLE on Hell, but after v1.10 that combination of modifiers is no longer dangerous enough to take precautions to avoid. Achmel represents Act Two, in Baal's sequential run of Act-themed monster packs.
Bartuc the Bloody
Type: Council Member
Special Attributes: Lightning Enchanted
Found in: Throne of Destruction
Quests: Bartuc and his entire pack must be killed before Baal will summon up the next bunch of monsters. All the packs must be destroyed to continue on your way to completing the Eve of Destruction quest.
Comments: Bartuc spawns with a pack of High Council minions. They do not drop like Champions, as the High Council minions do in Act Three. They can, however, cast Hydras. Bartuc can spawn with MSLE on Nightmare and Hell, but after v1.10 that combination of modifiers is no longer dangerous enough to take precautions to avoid. Bartuc represents Act Three, in Baal's sequential run of Act-themed monster packs.
Ventar the Unholy
Type: Venom Lord
Special Attributes: Extra Fast
Found in: Throne of Destruction
Quests: Ventar and his entire pack must be killed before Baal will summon up the next bunch of monsters. All the packs must be destroyed to continue on your way to completing the Eve of Destruction quest.
Comments: Ventar can spawn with MSLE on Hell, but after v1.10 that combination of modifiers is no longer dangerous enough to take precautions to avoid. Ventar represents Act Four, in Baal's sequential run of Act-themed monster packs.
Lister the Tormentor
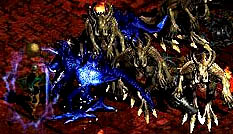
Type: Minion of Destruction
Special Attributes: Spectral Hit
Found in: Throne of Destruction
Quests: Lister and his entire pack must be killed before Baal will summon up the next bunch of monsters. All the packs must be destroyed to continue on your way to completing the Eve of Destruction quest.
Comments: Minions of Destruction are a special, dragon-like type of monster found nowhere else in the game. Lister can not spawn with MSLE; the only one of Baal's five monster packs who can not. He's quite dangerous anyway, with the fast attack rate of his monster type, and quite high damage. Lister with Cursed, or Extra Strong, or Might, is quite dangerous. Give him two of those, and you're really in trouble. Lister represents Act Five, in Baal's sequential run of Act-themed monster packs.
Baal
Type: Act Boss
Found in: Worldstone Chamber
Quests: Baal must be killed to complete the Eve of Destruction quest.
Comments: Baal is the final monster in D2X, but seldom the most difficult. Many players find him to be somewhat easier than his minions were, though he has enough spells and hit points to offer a challenge to most players. More info on his spells, tactics, and his full stats can be seen here.
Special Area SuperUniques
Besides the monsters found in the five acts, there are a few other special boss enemies to be concerned with.
Once a character defeats Baal on a given difficulty level, that character may open the red portal to the Secret Cow Level. There you will find the Cow King, and countless numbers of his (her?) mooing brethren. Hamburger them all.
|-
|- |
- Lilith
- Uber Baal
- Uber Izual
- Uber Diablo
- Uber Duriel
- Uber Mephisto
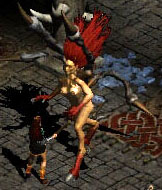
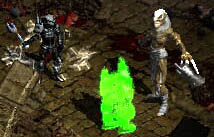
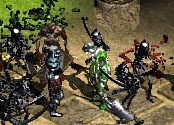
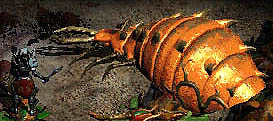
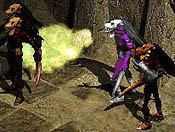
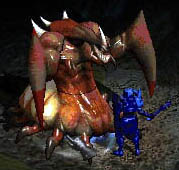
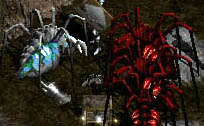
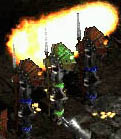
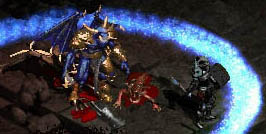
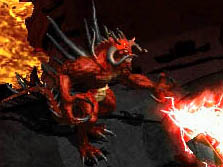
- Pandemonium DiabloBesides the Cow King, there are two other realm-only quests. The first has no proper name, and is commonly referred to as the Uber Diablo quest. In this quest players selling Stones of Jordan Unique Rings may trigger Uber Diablo to appear in the place of one of the SuperUniques in a given game. Uber Diablo is the only monster in the game who can drop Annihilus, the Unique small charm. See the Uber Diablo page for more details.
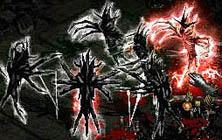
The other special quest was added in v1.11 and it is the biggie. It consists of four special areas in which players encounter the six SuperUniques (not including Uber Diablo) listed in the table to the right. Read about them individually, or see the Pandemonium Event page for full details about all of them and the quests they are a part of.

