Difference between revisions of "Quests Act Two"
Shadowtwin (talk | contribs) (breaking quests by page to match previous acts) |
m |
||
| Line 19: | Line 19: | ||
{{:The Summoner (quest)}} | {{:The Summoner (quest)}} | ||
| + | |||
{{:The Seven Tombs}} | {{:The Seven Tombs}} | ||
| − | |||
{{Quest navbox}} | {{Quest navbox}} | ||
| − | |||
| − | |||
| − | |||
[[category:quests]] | [[category:quests]] | ||
Revision as of 23:04, 2 September 2011
| |
Delete requested | |
| This article is a candidate for deletion, because: deprecated. If you believe this article should not be deleted, explain it on this discussion. |
| |
|---|
Contents
Act Two: The Secret of the Vizjerei
The main quest in Act Two is to find Tal Rasha's Tomb, to prevent him from being freed by Diablo. You are too late though, and you find a big surprise in the tomb instead, in what was the single most deadly spot in the game for a lot of characters until Duriel was nerfed in v1.09.
Quest One: Radament's Lair
- Quest Name: Radament's Lair
- Triggered By: Starting the Act
- Given by: Atma
- Location: Sewers, Level Three
- Reward: Book of Skill (+1 Skill Point), discounted prices in town
- Quest Priority: Not mandatory, but you'll always want to do it since it's got a great reward.
There are two entrances to the Sewers below town. Whichever you take you must find the stairs down and continue down to level three, where Radament will be found. This used to be a very popular area to level up in, but with v1.08 it became impossible to leech from skeletons, which rules this area out for almost all combat characters. There are zombies and other monsters you can leech from, but the majority of monsters here are Burning Dead.
Found on level three, Radament is a Greater Mummy that you must destroy to avenge the death's of Atma's husband and son. This is a preview of the dozens of Greater Mummies you will face later in the act, and Radament is surrounded by a substantial retinue of skeletons of all types which he can raise up after you destroy them. He also has a slashing claw melee attack, and a poison breath ranged attack.
Tips: The stairs down from Sewers 1 are in one of three locations every time. You should always enter by the stairs near the waterfront, and go to the right. Most of the time the stairs down will be in the far right corner of the level. If not there, go back to the south, past the entrance, and they will usually be in that corner, or a bit down or up from there.
Using a cold attack on Radament's skeleton minions is very useful to shatter them so they can't be resurrected. If you can't do that, you should try to lead them away from him so they are out of resurrection range.
Quest Two: The Horadric Staff
- Quest Name: The Horadric Staff
- Triggered By: Returning the Horadric Scroll to Deckard Cain or recovering the Horadric Cube
- Given by: Cain
- Location: Horadric Cube: Halls of the Dead, Staff of Kings: Sand Maggot Hive level three, * Viper Amulet: Claw Viper Temple, level two
- Reward: The Horadric Cube is kept after the quest, and used throughout the game for many useful purposes. More info about it here.
- Quest Priority: It is mandatory if you are playing alone, but not mandatory if you party with someone else who has the Horadric Staff.
To complete this quest you must find a Horadric Cube, the Staff of Kings, the Amulet of the Viper, and combine the Staff and Amulet in the Cube and transmute them into the Horadric Staff. You then show that to Cain and he will give you the fourth quest, and you will be allowed into the Palace of Lut Gholein to continue on in the act.
- The Cube is found on level three of the Halls of the Dead, a dungeon area below the Dry Hills.
- The Staff of Kings is found in a chest by the Queen Maggot on level three of the Maggot Lair, found below the Far Oasis.
- The Viper Amulet is found in a golden chest on level two of the Claw Viper Temple, the entrance to the temple is in the Valley of Snakes, a small surface area off of the Lost City.
These three quests can be done in any order, but the logical progression is Cube, then Staff, then Amulet, since that's the order you'll reach them as you move through the act. Obtaining the Amulet is the third quest of the act, but you need it to make the Horadric Staff, so these two quests partially overlap.
Once you have the Cube and both pieces of the staff, you stick the staff and headpiece (Viper Amulet) into the Cube and transmute them into the Horadric Cube. You then show that to Cain, and he will tell you what it can be used for and give you the next quest.
Tips: You can get a cube from another character and save yourself the trouble of doing the Halls of the Dead. If other characters finish the Staff or Amulet areas in your game, enough of those items will drop for everyone who doesn't have one already, and you can hop down through their Town Portal and get one with no effort.
The Halls of the Dead are a pretty easy area. The Sand Maggots are a little trickier. You should be sure to find the Far Oasis waypoint before you enter the hive, or it's a long walk back afterwards. Be careful in the Queen's area, she emits a very toxic poison when she dies and it will take you down to one hit point in very short order. The Claw Vipers are part of this quest also, but since they are the whole Quest Three, read on for more info on them.
| |
Delete requested | |
| This article is a candidate for deletion, because: wrong name. If you believe this article should not be deleted, explain it on this discussion. |
- REDIRECT Tainted Sun
Quest Four: Arcane Sanctuary
- Quest Name: Arcane Sanctuary
- Triggered By: Showing Cain the Horadric Staff
- Given by: Lord Jerhyn
- Location: Find the portal to the Arcane Sanctuary on the third level of the Harem Cellar
- Reward: None, other than access to the Arcane Sanctuary, which you need to complete Quest Five.
- Quest Priority: Mandatory if you are solo. In a party you do not need to, if someone else in the party has the Horadric Staff or has already finished off the Summoner (Quest Five) and you can get a portal to the Tombs or the Canyon of the Magi.
Once you have the Horadric Staff completed, Cain speaks to Jerhyn on your behalf, and convinces him that you are trustworthy. You can then speak to Jerhyn and gain access to the Palace. There are two levels of the Palace, then you enter the three levels of the Palace Cellar, and right in the middle of the third level you'll find the portal to the Arcane Sanctuary.
Getting into the Palace can be tricky, if the person who created the game hasn't done the quest yet when you complete it. Jerhyn won't give you the quest yet, and the Guards will block you from entering the Palace. You will sometimes have to create a new game to get in, if you can't find one to join that will allow you. Or you can ask for a portal to the Palace or Arcane Sanctuary waypoint and be able to get in that way in the future.Tip: The Palace levels are small squares, and they have the same layout every game, with semi-random doorway locations. Once you've done them a few times, you'll have them more or less memorized. A Sorceress or character with teleport charges can teleport down through the palace in literally 5 seconds per level. The Palace isn't a bad place to level, but the Arcane is better, so no real point in sticking around, especially with the many skeletons non-leech. There aren't any golden chests or many chests at all, though the large round beds on the upper levels of the palace can be clicked to reveal a hidden bonus of treasure.
Quest Five: The Summoner
- Quest Name: The Summoner
- Triggered By: Talking to Cain once you reach the Arcane Sanctuary, or just moving near the Summoner's location in the Arcane Sanctuary
- Given by: Deckard Cain
- Location: The Summoner is found at the tip of one of the four points of the Arcane Sanctuary
- Reward: Killing The Summoner opens a portal to the Canyon of the Magi, and reveals the true tomb of Tal Rasha.
- Quest Priority: This quest is not mandatory. You can party with someone who has done it and has the Horadric Staff, or if you have the Horadric Staff you can just explore the seven tombs at random until you find the correct one if you can get to the Canyon of the Magi.
The Arcane Sanctuary is a very weird area, with bizarre, distorted architecture inspired by the art of MC Escher. The monsters found there are always the same, Dark Lords, Specters, and Goat Men, and they are quite densely-packed. This was one of the best leveling areas in the game prior to v1.08, but it's now no good for warrior characters since the Dark Lords and Specters are nearly physical immune, especially on Nightmare and Hell, and you can't leech from the Specters at all. You want a Sorceress here with you now.
There are four distinct limbs to the Arcane, and the type of layout is the same every time, though their locations are random. One way always has teleporters, one way has a lot of triple switch backs, one way is mostly straight with little zig zag staircases, and the fourth way is always straight and flat. Characters with ranged attacks love the teleporter way, and other ways with steps or cut backs that stop the monsters from advancing, while melee characters like the more straight ahead paths.
Tips: This is a very experience-rich area for characters playing within the usual progression rate, and it's popular to level up there, though the changes to leeching and physical resistance in v1.08 have made it difficulty for warrior type characters. If you are looking for the Summoner, rather than just killing things for experience, you should move to the very tips of the four directions quickly, since he'll always be in one of those. If you can't teleport, it's faster to get to an end, portal back to town, and run to the waypoint to return to the Arcane, rather than running all the way back over the branch you just cleared out.
Look at the final area once you kill the Summoner, there are six glowing glyphs on the walls, these six mark the false tombs. The one that's not displayed is the true tomb. Initially in Diablo II you had to note which one was not shown there, and then find it in the Canyon. This proved too difficulty for players to notice, so Blizzard added the true tomb display to the Quest Window, making it idiot-proof.
The Summoner will sometimes drop the Key of Hate on Hell difficulty. This artifact is used in the Pandemonium Event, a realm-only mega-quest.
Quest Six: The Seven Tombs
- Quest Name: The Seven Tombs
- Triggered By: Reaching Clvl 20, or completing Quest One, Two, or Three.
- Given by: Jerhyn
- Location: Tal Rasha's Tomb, beneath the true tomb in the Canyon of the Magi
- Reward: Defeating Duriel and speaking with Tyrael allows you to advance to Act Three, once you return to town and talk to Jerhyn so he'll order Meshif to sail you to Kurast
- Quest Priority: This quest is mandatory to move on to Act Three.
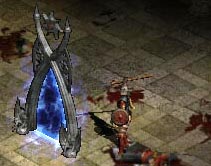
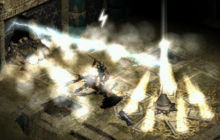
Inside one of them you'll find the Orifice. You must insert the completed Horadric Staff into the orifice, and it will put on a pretty light show and break open a wall, leading down to Tal Rasha's tomb.
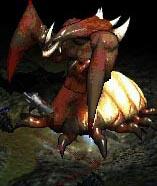
Prior to Duriel being nerfed in v1.09, this was probably the single-deadliest spot in the entire game, as the massive Lesser Evil Duriel awaits you inside the small tomb, and he hits very, very hard. It's a very good idea to do this part of the game with some tank character or minions if you aren't a massive melee fighter type character with hit points galore. This is especially true on Nightmare and Hell.
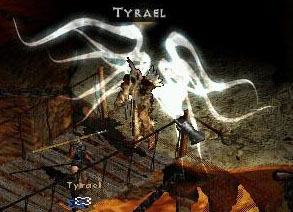
Duriel has a huge damage charge attack, but once you close to melee range he's less deadly, with a bash and jab attack. He also has a Holy Freeze aura, so you'll always be slowed down as you try to run from him and will be hitting him more slowly as well. Lots of hit points and a minion or two to take the initial charge from him is required, unless you have Barbarian or Druid style huge hit points.Once you defeat Duriel he'll usually drop some pretty good stuff. A doorway opens up to the left, and you move through it and down a long hallway until you encounter Tyrael. He tells you that you are too late, that Diablo and Baal/Tal Rasha have already escaped, and opens a portal for you to return to town.
Once there you need to talk to Jerhyn, which officially completes your quest and will allow Meshif, the ship's captain, to take you on to Kurast and Act Three.
Tips: The seven tomb entrances and the Canyon are always the same layout. From left to right they are Circle, Crescent, Square, Broken Box, Double-V, Triangle, Circle-Crescent. You can memorize them or draw a little map, and when you get to the Canyon after doing the Summoner and learning which is the correct tomb, you can check your map and go right to the entrance. Quicker than roaming around the perimeter of the Canyon, though many people like to clear it all out for the experience anyway.Often on Battle.net you'll be in a game created by someone who hasn't done the quest yet, and it will be impossible to enter the Palace to click on Jerhyn to get him to finish this quest and allow you to sail with Meshif. You can either stand by the entrance to the palace and wait for him to come closer, or take the waypoint to the Palace Cellar or even the Arcane Sanctuary and then run up through the Palace to come up the stairs inside and reach Jeryhn that way.
| Quests of Diablo II - Quest Items [e] | |||||
|---|---|---|---|---|---|
| Diablo II | Lord of Destruction | ||||
|
Act I |
Act II |
Act III |
Act V |
Special | |


